Thursday, September 13, 2012

A Horse with No Name - further along the trail...


Not finished yet, not even close, but at least the white background is no longer staring me down.  There's still a long way to go and there's still no horse.  Maybe there will never be a horse. Unless you count the seahorse.

Saturday, April 21, 2012

Horse With No Name - Preliminary


I've been pretty much thinking about that horse wandering in the desert since America came out with the song  A Horse With No Name back in 1972.  Was it about a journey in the desert, or was it a spiritual metaphor, or was it an armchair foray induced by a drug trip? Since “horse” is a nickname for heroin it inspired all kinds of paranoia and was even banned on some radio stations. This, of course, simply increased its popularity. The song still gets air play 40 years later. 

No one really knows the true story behind the song so it remains on the musical mystery list, along with other titillations, such as just exactly who was it that was so vain in Carly Simon’s song?  After decades of speculation I’m pretty sure that even she’s not quite clear on it.  The same goes for Horse.  Whatever the inspiration - be it innocent or tawdry - it spawns great visuals.  You have a horse.  You have a desert. You have a guy who, after three days in the desert sun, is regretting having forgotten his sunblock (which wasn’t exactly popular in the 1970’s when we sun-fried ourselves into bacon strips while tanning on the beach).  You have at least the potential for a drug trip, and while heroin isn’t hallucinogenic, the visual elements mentioned in the song lead the imagination down the road to the psychedelic.  And, seriously, could a guy not on a drug trip come up with lyrics like, “the ocean is a desert with its life underground”?  I think not. 

So here is the very beginning of this quilt – just the background, mostly all hand dyed/painted.  The plants and birds and rocks and things have yet to be added.  The white area will hopefully be where the desert turns to ocean.   But I’m not that far along on the trip just yet…

Hopefully you haven’t noticed that there isn’t even a horse yet.  When he does arrive I might just give him a name.

Sunday, April 1, 2012

The Happy Nine Patch


Quilt No. 82
February 2012

In the fall of 2011 our quilt guild president announced this year’s challenge. We were to do a nine patch quilt. Apart from that, there were no limitations – it could big or small, conservative or wacky, or any variation of the nine patch we wanted – whatever suited our personal styles.

Challenge quilts are kept secret until we do our “reveal”. Our guild has a variety of quilters, who do every possible type of quilting imaginable. That’s the great thing about quilting – you could go on for a lifetime and never come to the end of the permutations of what can be done with a pile of fabric and a sewing machine, or a needle and thread. It’s like composing music – the possibilities will never be exhausted. I actually used to worry that this could happen when I was a kid – that musicians would finally come to the end of every conceivable combination of notes. I speculated that by the time I was ten years old, no new songs could ever be created again. I would have to listen to the Beatles singing about wanting to hold my hand in perpetuity - maybe not such a bad thing but there was the outside chance that it could get tiresome. Thankfully, creative pursuits are by their very nature unlimited.

Quilters are interesting creators because they can “think” in blocks. They can take shapes and break them down into clever components and come up with the pieces that will yield a perfect square representing anything from a flower to a compass to a cow. It’s something I have no talent for whatsoever. But I do like to take a concept, or an idea, and express it with fabric.

I decided my “nine patch” would be different. Traditionally a nine patch is a grid that is 3 blocks high and 3 blocks wide. The most common nine patch you’ll see is a tic-tac-toe game. Nine patch blocks can be re-arranged or re-cut to form an endless number of quilt variations. The previous summer I’d done a nine-patch quilt, and to save myself from embarrassment, let’s just say it was a less than happy experience. This time I wanted to have a happy nine patch experience - without the blocks. I just wanted the nines.

And so...the Happy Nine Patch was born – a group of cheery numeral nines cavorting on a lawn that is composed from a single silk neck tie. With a little creative piecing, I was able to make the borders from the same tie. The sky is a hand dyed piece, machine quilted to enhance the clouds. Additional machine quilting on the borders keeps the Happy Nines in their place.

Friday, March 30, 2012

Cloth Mountain


Quilt No. 84
March 2012

I was firmly embedded in my big leather chair reading a quilting magazine when I came across it -  a quilter describing how her fabric stash had become a “mountain of cloth”.  It hit me like a bolt of fabric: Cloth Mountain!  What better way to ransack my bloated fabric collection than by creating an actual “cloth mountain”?  I immediately began rummaging in boxes, dressers, bags, and my four sets of rolly plastic wheely drawers, admiring all the odd fabric bits I’d collected.  But how could I pull all of that loveliness together – and make it look like a mountain?  I’d need a whole lot of little pieces, but I didn’t I want to start randomly hacking tiny corners from a few hundred fabrics.  Perhaps this idea needed time to form on its own.

I resisted the adrenaline rush of first inspiration, and turned my attention back to other unfinished quilts.  I decided that when I had very small left over fabric pieces - below potentially usable “scrap” size - I would put them in a box and audition them later for Cloth Mountain.

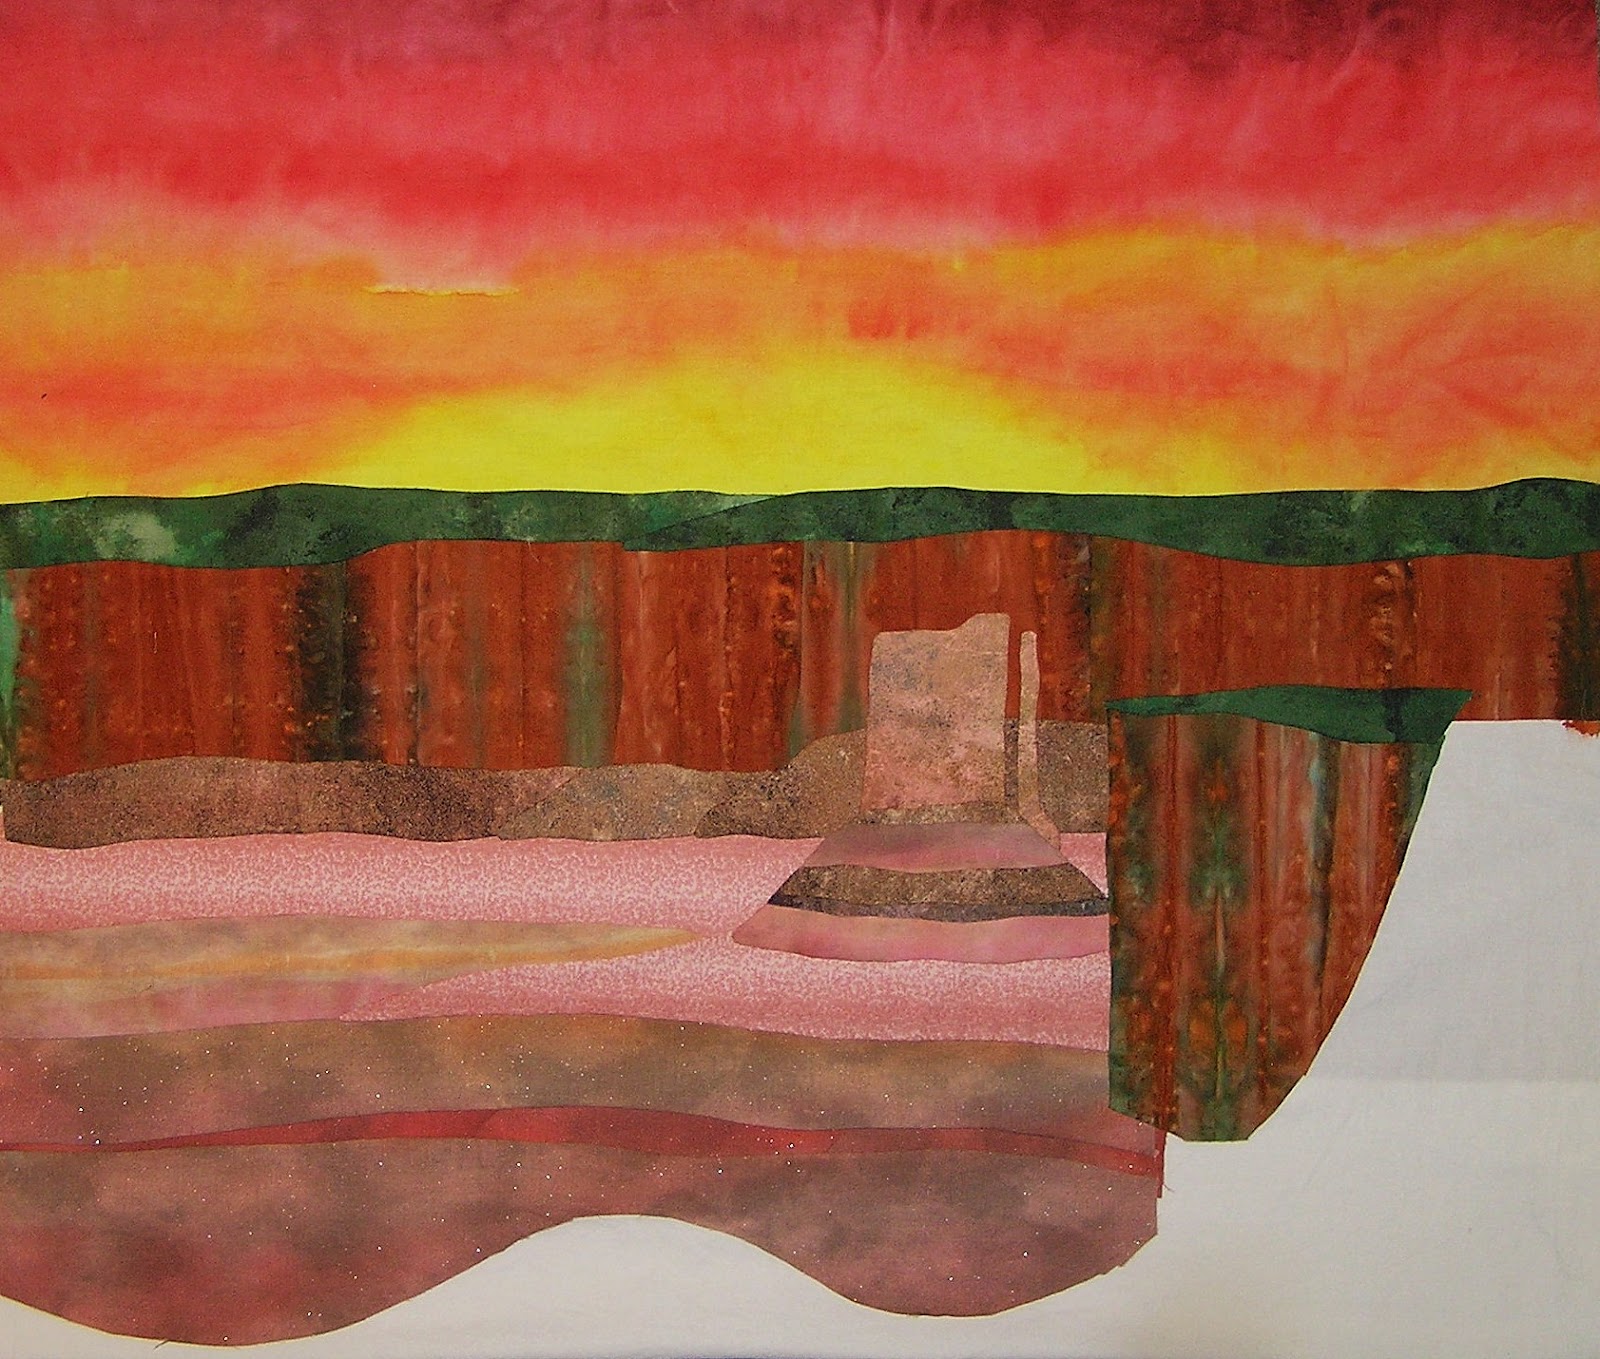
After completing Julie’s Garden I noticed there were a lot of nice green pieces in the box.  A picture stared to emerge in my mind.  I would need white transitioning to grey, followed by darker grey, and then on through a range of greens.  And I already had most of the greens!  Now I was able to consult a much smaller number of boxes, bags, and fabric hiding places.  I cut a bunch of mini-scraps and into strips with the rotary cutter, and then sectioned these into irregular squarish pieces, dividing them up by colour and then each colour by value.  This technique is used in confetti quilting but with much smaller pieces.  It also requires a layer of tulle on top to hold everything in place. I wanted the mountain pieces to stay loose and shaggy, to resemble a cast off pile of random fabric bits so I had to do this without the tulle.

I found some stabilizer with grippy dots on it and drew a mountain on it. I began at the white peak of the mountain, and using monofilament thread and free motion quilting, loosely tacked one small section of pieces at a time onto the stabilizer, keeping the pieces loose looking.  It worked fairly well as long as I remembered not to fold the fabric during the quilting process.  If I did that the pieces would dump all over the place and have to be re-placed – again and again.  Eventually I got the mountain entirely covered.  It had almost as many pieces on it as the floor did.  The pieces migrated throughout the entire house and are still showing up in inexplicable places - like the drawer under the kitchen stove (which I swear contains pots and pans, not fabric).  I sewed the now “stablized” and assembled mountain onto the hand dyed background.

Now... what to put on the mountain?  My original rough drawing contains miniature skiers and snowmobilers, questing hikers, and a sewing machine perched at the summit.   All of this, when rendered in cloth, looked ridiculous – the scale was just too odd.  The design wall inside your head is far more forgiving that the one in front of your eyes!  I went back to thinking about what the concept was for this quilt.  It was a mountain of cloth.  And what had my personal mountain of cloth generated?  So far, 85 art quilts and related works!

I have digital photographs of all of these, but how to go from these to cloth, and how to keep the printed photos small enough?  Resizing 85 photos to less than half an inch across seemed likely to be a lifetime pursuit rather than a way to finish a quilt.  I noticed that the computer screen showing the quilt photos as icons looked like it might do the trick.  I did a screen capture of these icon pages and printed them out on iron-on printable  cotton.

When cut out into individual quilt photos the icons were the exact right size... if only I knew where to put them. Equally spaced around the border? The whole piece looked like a jumble. There was no place for your eyes to focus. On the mountain? They were completely lost to the eye.

The only empty area was the sky. But how would these 85 quilts get into the sky – what excuse would they use? A bird? A plane? Superman? A kite? That was it! I strung the icons spaced out along white strings behind the kite, but it still didn’t work. I sent a photo to my sister to get her input. She suggested that the quilt icons should not have spaces between, that they should touch one another. Brilliant – now they formed a continuous line that was pleasing to the eye. And so they came to be launched as the tails of a kite, stretching from the sky to the bottom of the quilt where a road sign announces “Cloth Mountain, Population 85” - celebrating of all my quilting projects so far.